Version: 4.26, 中文
Created: 2021-02-22, Updated: 2021-03-25
Author: Cyanhall
👉 Star me if it’s helpful.
Created: 2021-02-22, Updated: 2021-03-25
Author: Cyanhall
👉
1.
Preparation
This is the effect we are going to make in this tutorial.
Note: The main content of this tutorial comes from the
Tip: Use ⬆️ ⬇️ to turn the page up and down. We recommend browsing with a large screen for a better reading experience.
Note: The main content of this tutorial comes from the
Content Examples that come with Unreal EngineTip: Use ⬆️ ⬇️ to turn the page up and down. We recommend browsing with a large screen for a better reading experience.
Full Tutorials:
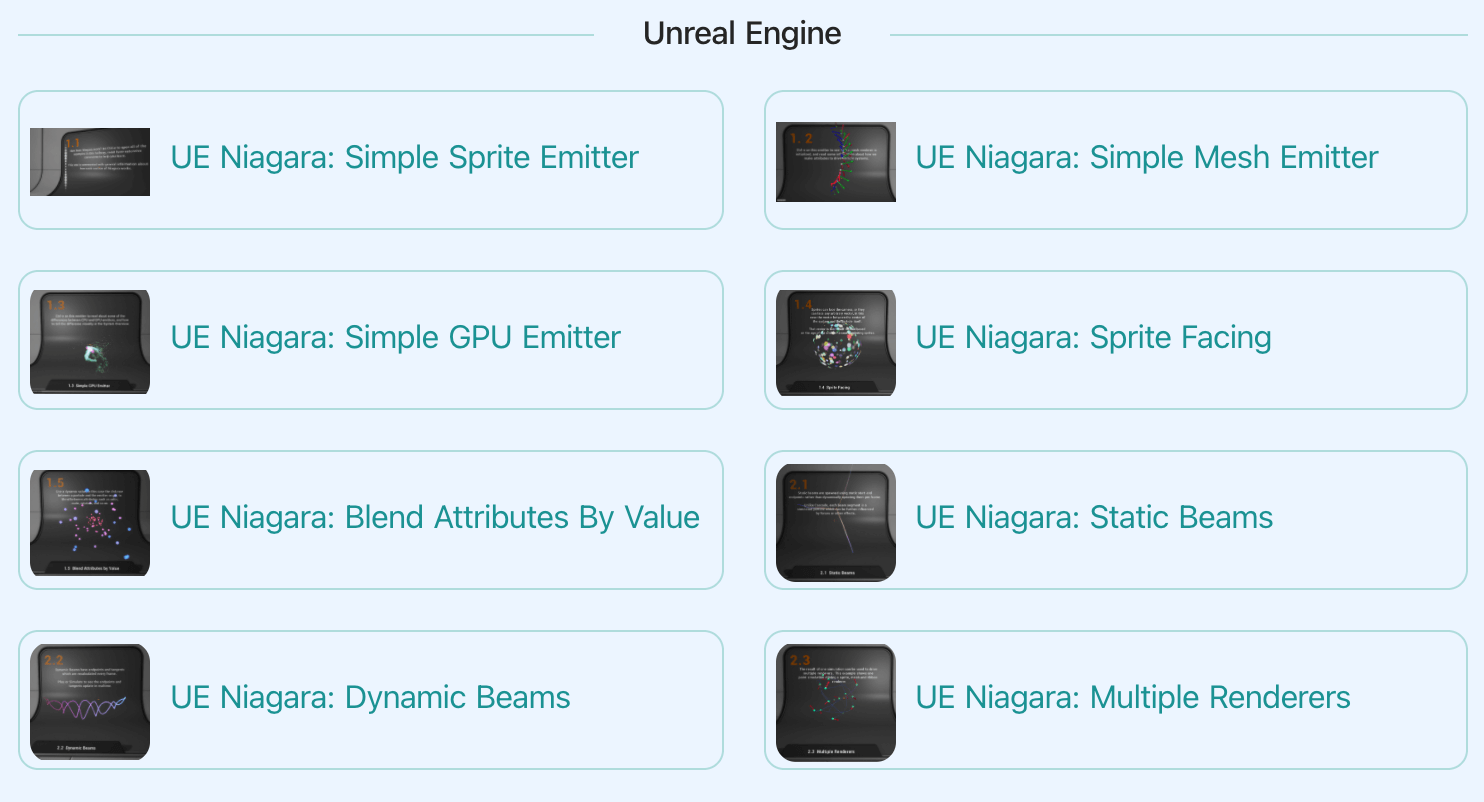
1. UE Niagara: Simple Sprite Emitter
2. UE Niagara: Simple Mesh Emitter
3. UE Niagara: Simple GPU Emitter
4. UE Niagara: Sprite Facing
5. UE Niagara: Blend Attributes By Value
6. UE Niagara: Static Beams
7. UE Niagara: Dynamic Beams
8. UE Niagara: Multiple Renderers
9. UE Niagara: Location Events
10. UE Niagara: Expressions
3.
Introduction
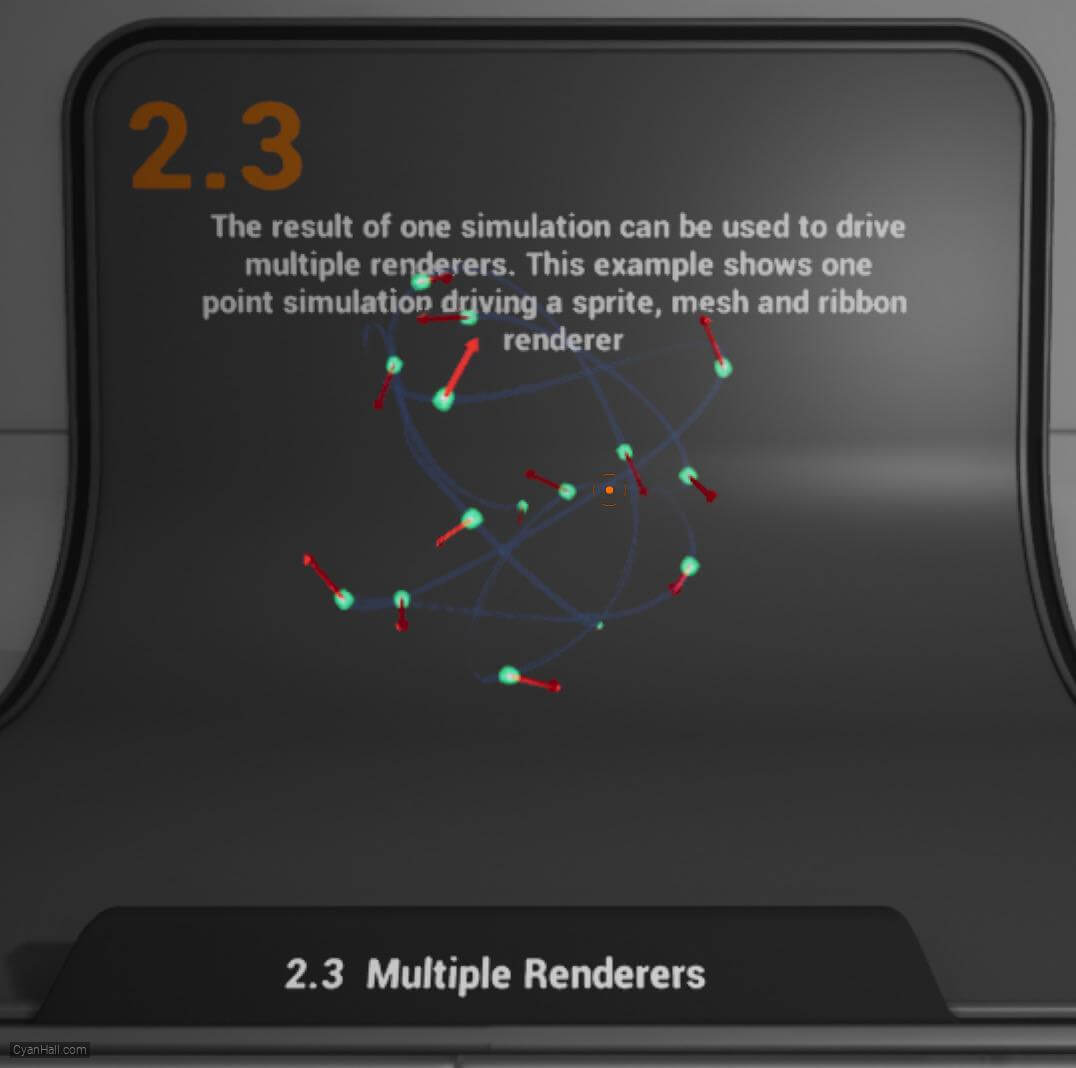
The result of one simulation can be used to drive multiple renderers.
This example shows one point simulation driving a sprite, mesh, ribbon renderer.
This example shows one point simulation driving a sprite, mesh, ribbon renderer.
4.
Let's start the reconstruction
Right click and select
FX => Niagara System to create. 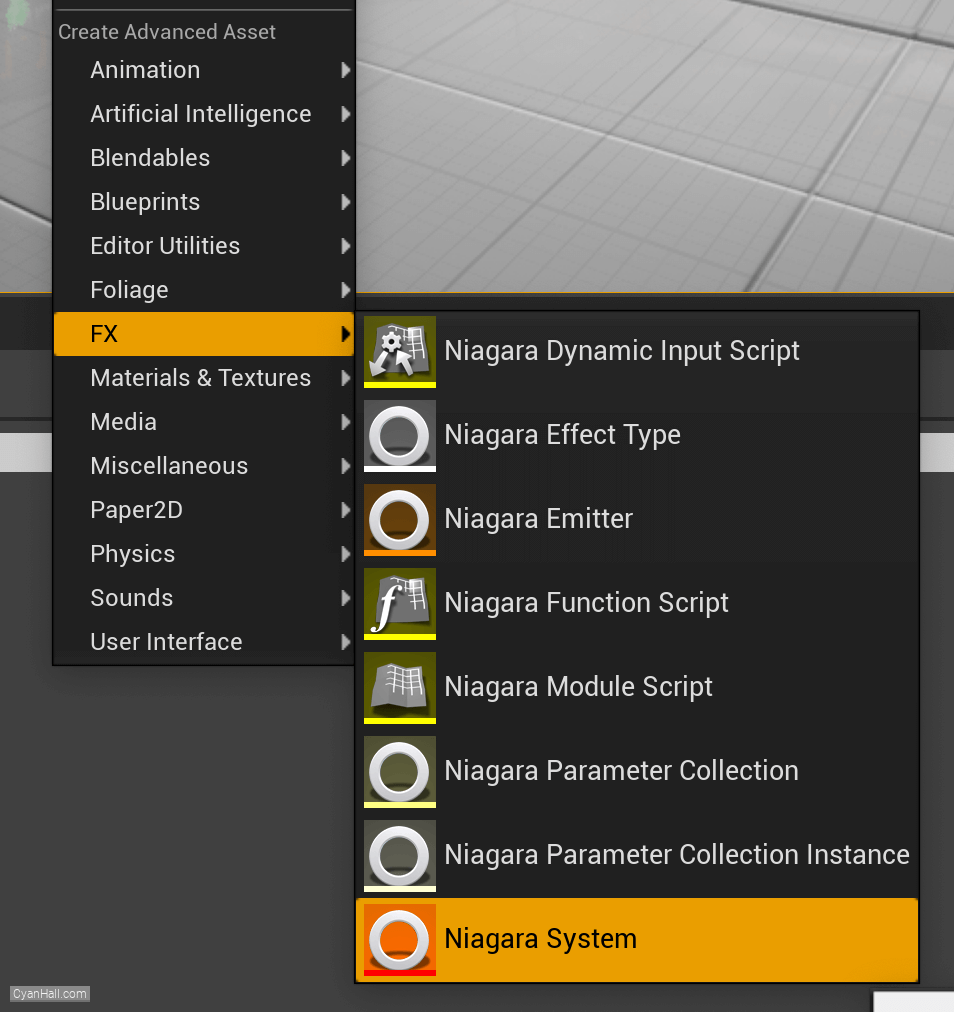
5.
Create Niagara System
Select
Empty template, click + and Finish 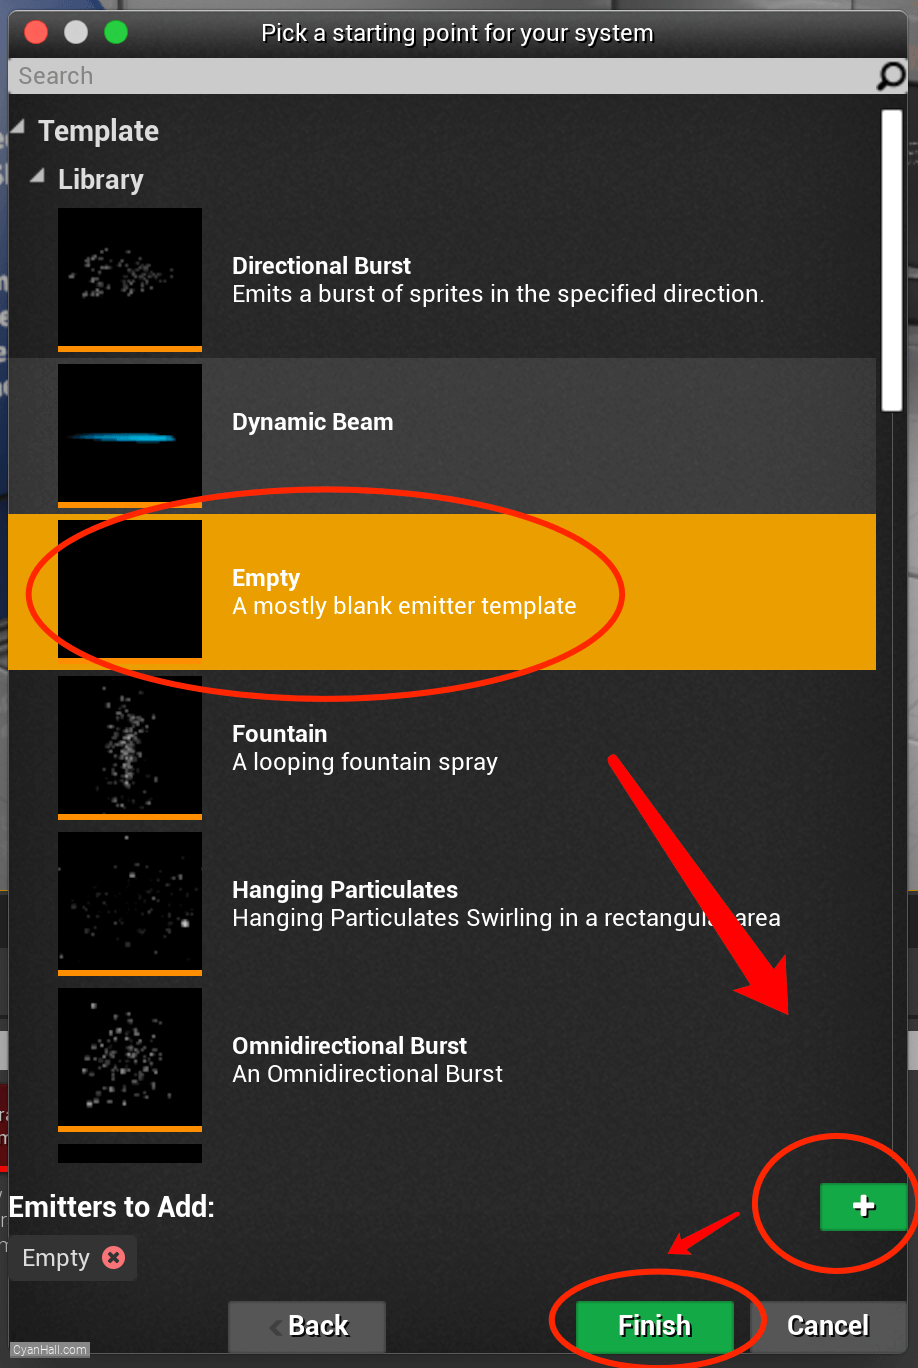
6.
Create Niagara System
As a result, we get a
Niagara System asset, click to open it. 
7.
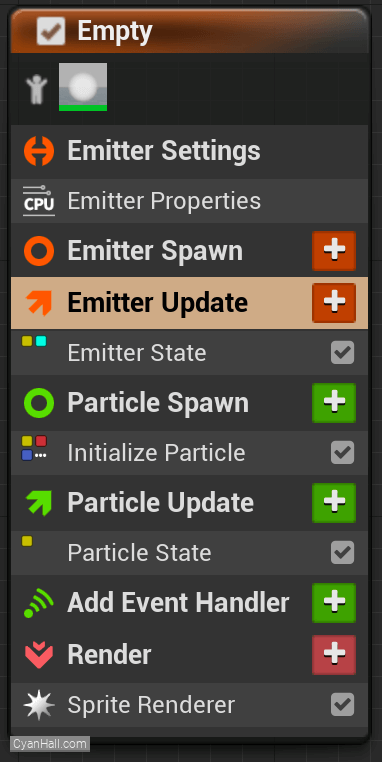
Empty Niagara System
You can see that we have an empty Niagara system.
8.
Spawn Rate
Click on the
+ sign to the right of the Emitter Update to add the Spawn Rate module.Spawn Rate: Number of particles per second to spawn. 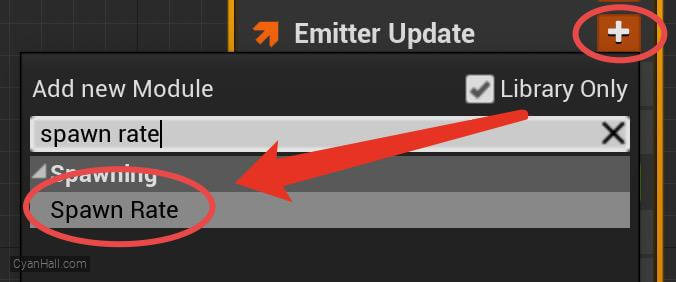
9.
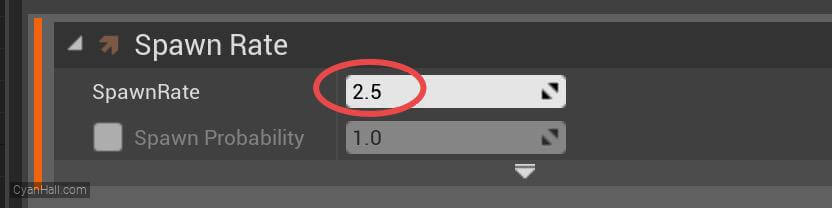
Spawn Rate
Set the
Spawn 2.5 particle per second.
Spawn Rate value to 2.5.Spawn 2.5 particle per second.
10.
Initialize Particles
Select
1.
2.
3.
4.
Initialize Particles and set:1.
Lifetime is 6.02.
Color Mode is Direct Set and sets its value to (0, 1, 0.3, 1)3.
Sprite Size Mode is Uniform and has a value of 8.04.
Mesh Scale Mode is Non-Uniform and its value is (1, 1.5, 1.5) 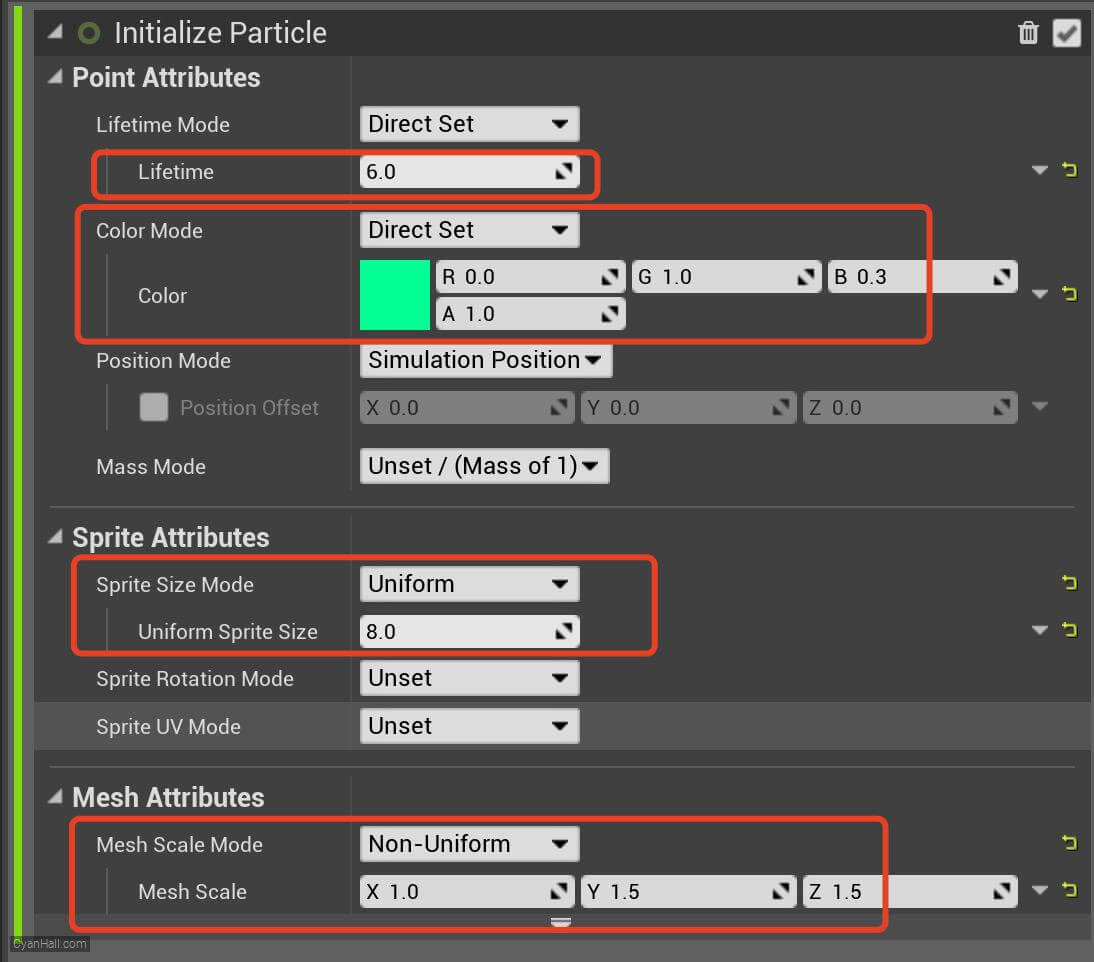
11.
Set Parameter
Add
Set new or existing parameter directly module to the Particle Spawn section. 
12.
Set Parameter
Add a
Linear Color parameter. 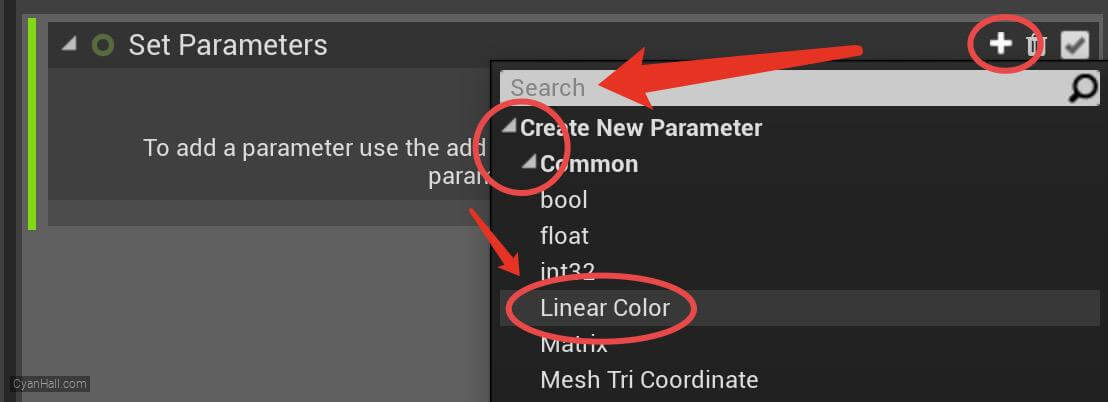
13.
Set Parameter
Select to rename this parameter

14.
Set Parameter
Rename this parameter to
RibbonColor 
15.
Set Parameter
Add
RibbonWidth parameter 
16.
Set Parameter
Set the value of
Renderer Bindings, such as Color, or Scale, are set under the hood within many modules, but can also be set directly in the stack as you see here with RibbonColor or RibbonWidth.
If you create a new Parameter in the parameters pane, you can drag it directly into the stack to set it.
RibbonWidth to 2.5Renderer Bindings, such as Color, or Scale, are set under the hood within many modules, but can also be set directly in the stack as you see here with RibbonColor or RibbonWidth.
If you create a new Parameter in the parameters pane, you can drag it directly into the stack to set it.

17.
Sphere Location
Add the
Sphere Location module in the Particles Spawn section. 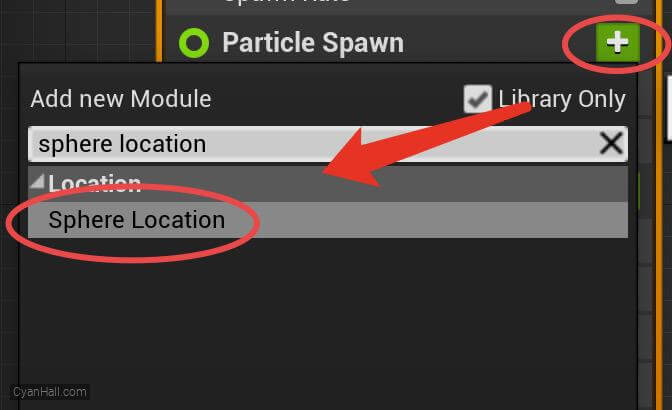
18.
Sphere Radius
1. Set
2. Turn on
Surface Only Band Thickness: Spawn particles only on the surface of the sphere.
Sphere Radius to 95.02. Turn on
Surface Only Band Thickness and set its value to 2.5Surface Only Band Thickness: Spawn particles only on the surface of the sphere.

19.
Vortex Velocity
Add
Vortex Velocity module to the Particle Update section. 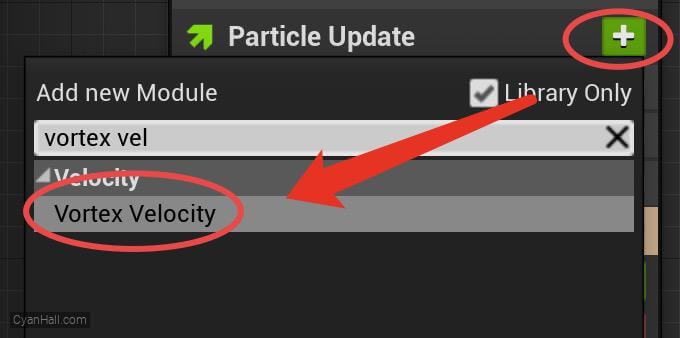
20.
Vortex Velocity
Click the first
Fix issue button to add its dependency on the SolveForcesAndVelocity module. 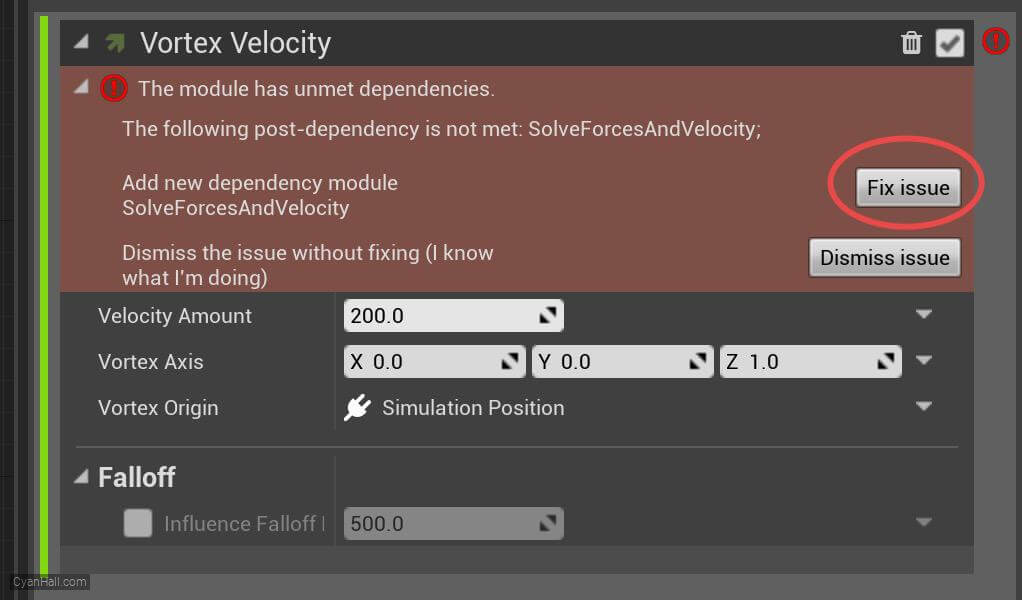
21.
Vortex Velocity
Set the value type of
Velocity Amount to Random Range Float 
22.
Vortex Velocity
1. Set the Minimum value of Velocity Amount to
2. Set the Elevation Type value for Velocity Amount to
3. Set the Vortex Axis value to
50.0 and the Maximum value to 150.0.2. Set the Elevation Type value for Velocity Amount to
Every Frame3. Set the Vortex Axis value to
Random Vector 
23.
Scale Sprite Size
Add the
Scale Sprite Size module to the Particles Update section. 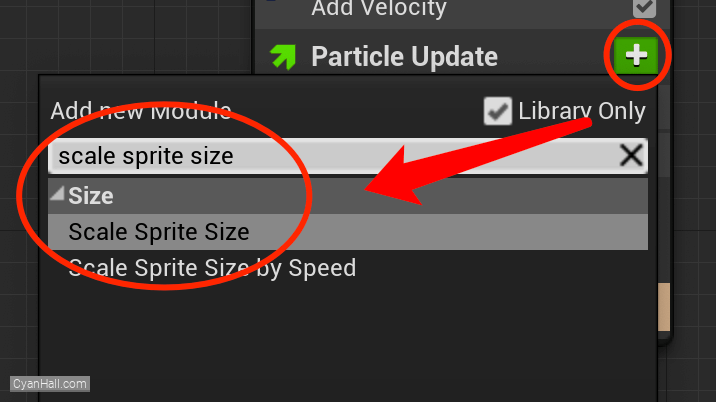
24.
Scale Sprite Size
Edit the
Scale Factor's value to Vector 2DFrom Float. 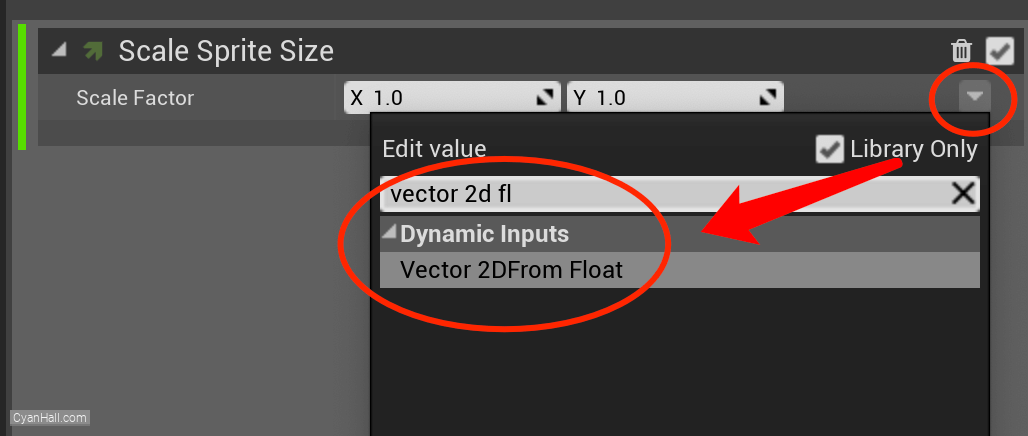
25.
Scale Sprite Size
Set its value type to
Float from Curve. 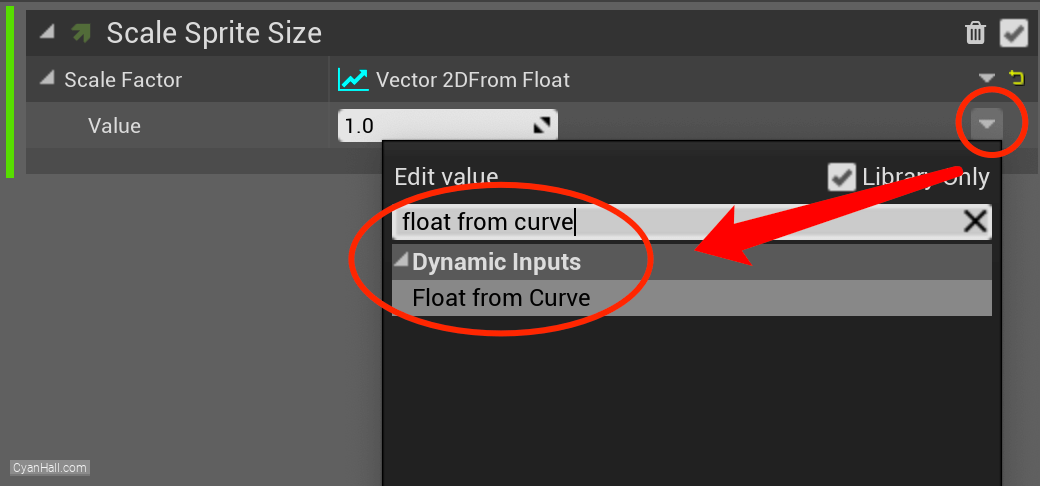
26.
Scale Sprite Size
Edit this curve to control its value over time
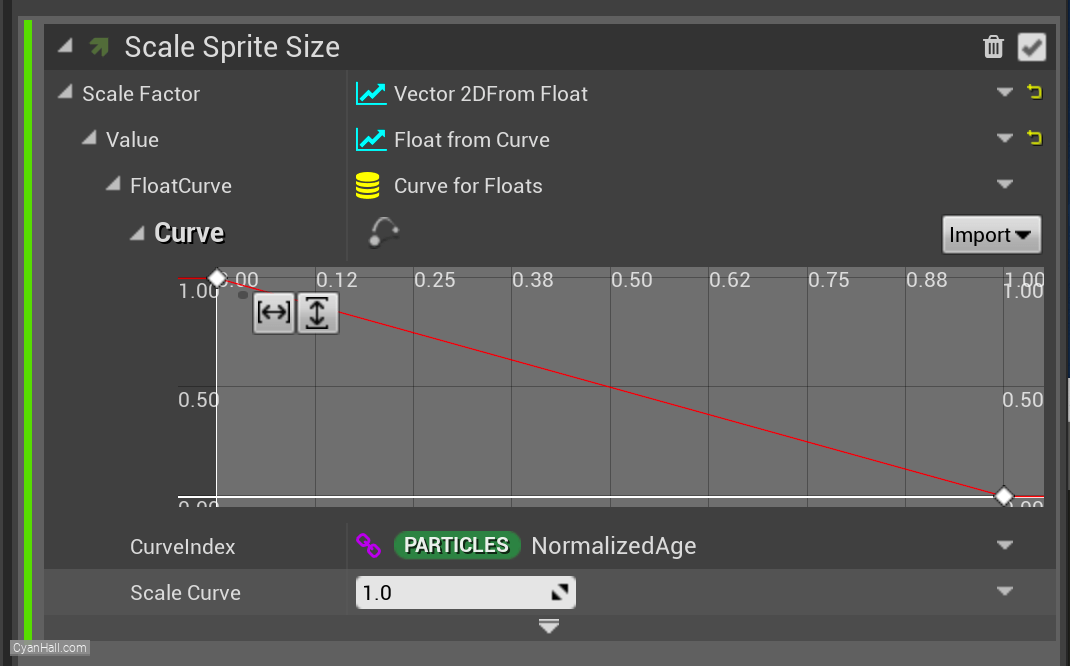
27.
Scale Sprite Size
Select the first point and drag it to the bottom.
Note: Here you can also select this point and directly set its
Note: Here you can also select this point and directly set its
Time to: 0 and Value to 0. 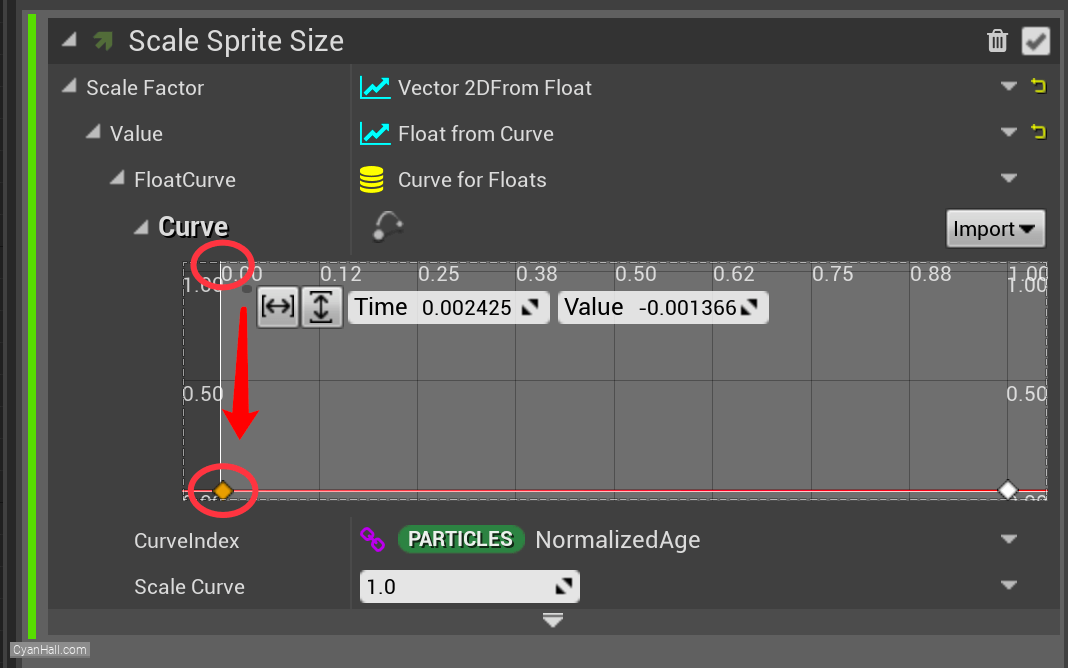
28.
Scale Sprite Size
Mouse over the small red circle, right click, and select
Add key to Curve. 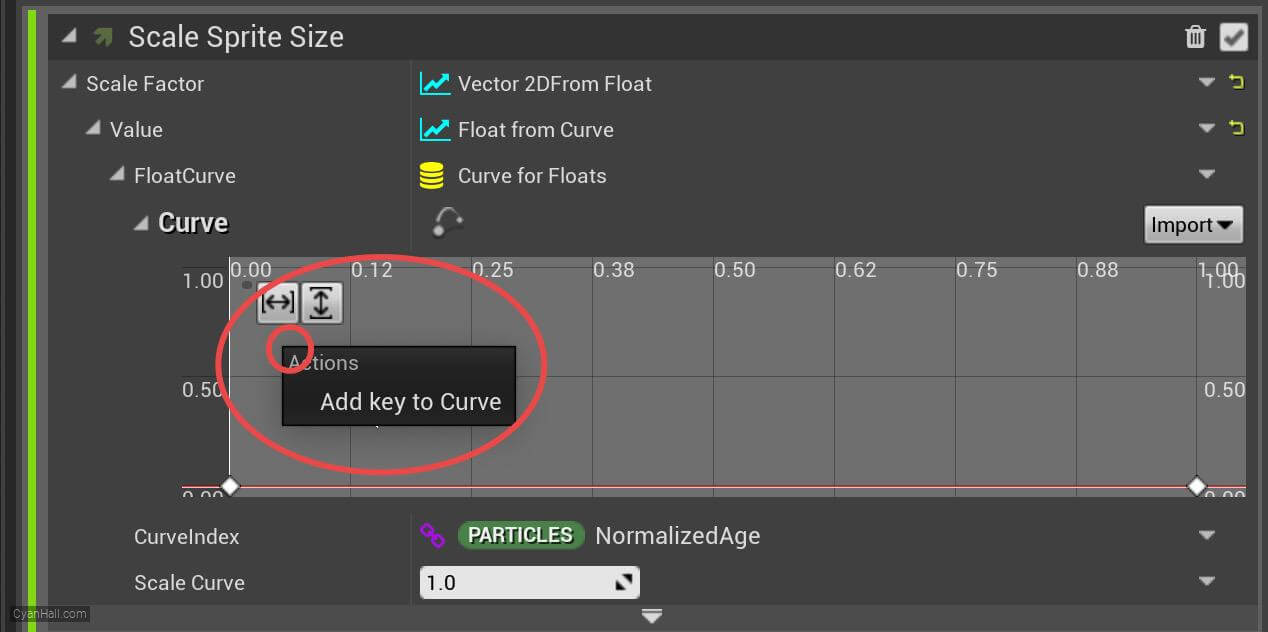
29.
Scale Sprite Size
Set the
Time of the newly added point to 0.06 and the Value to 1. 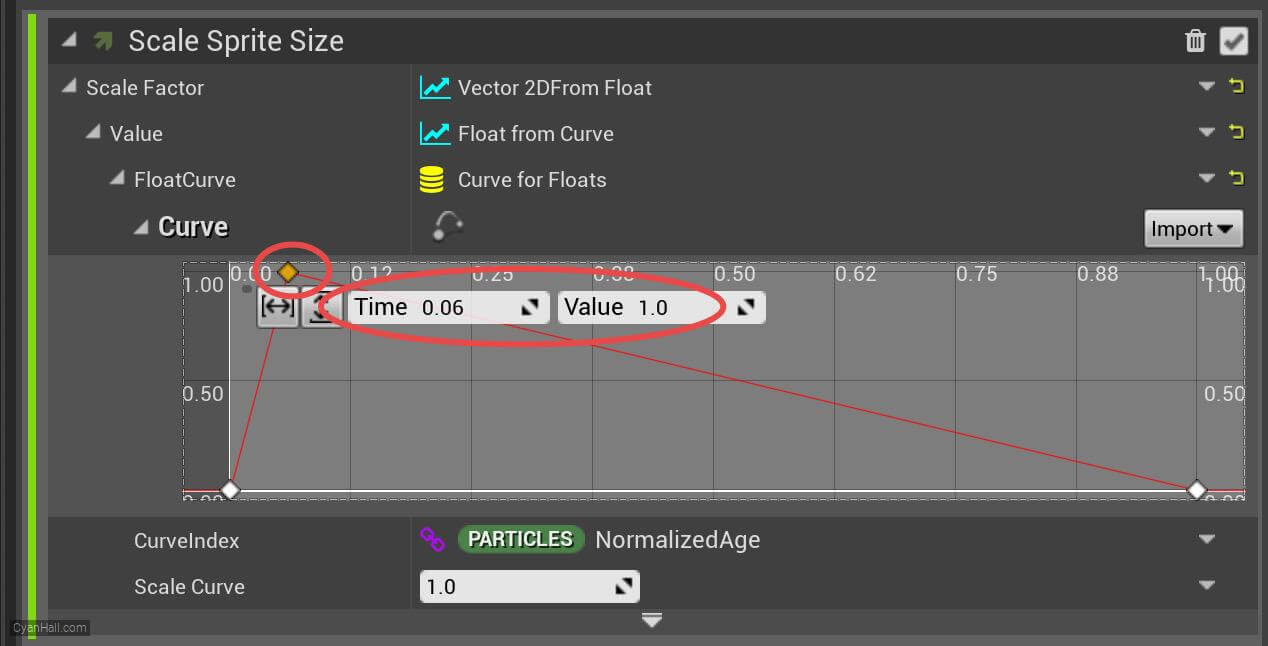
30.
Scale Sprite Size
In the same way, add a point:
Time is 0.92 and Value is 1. 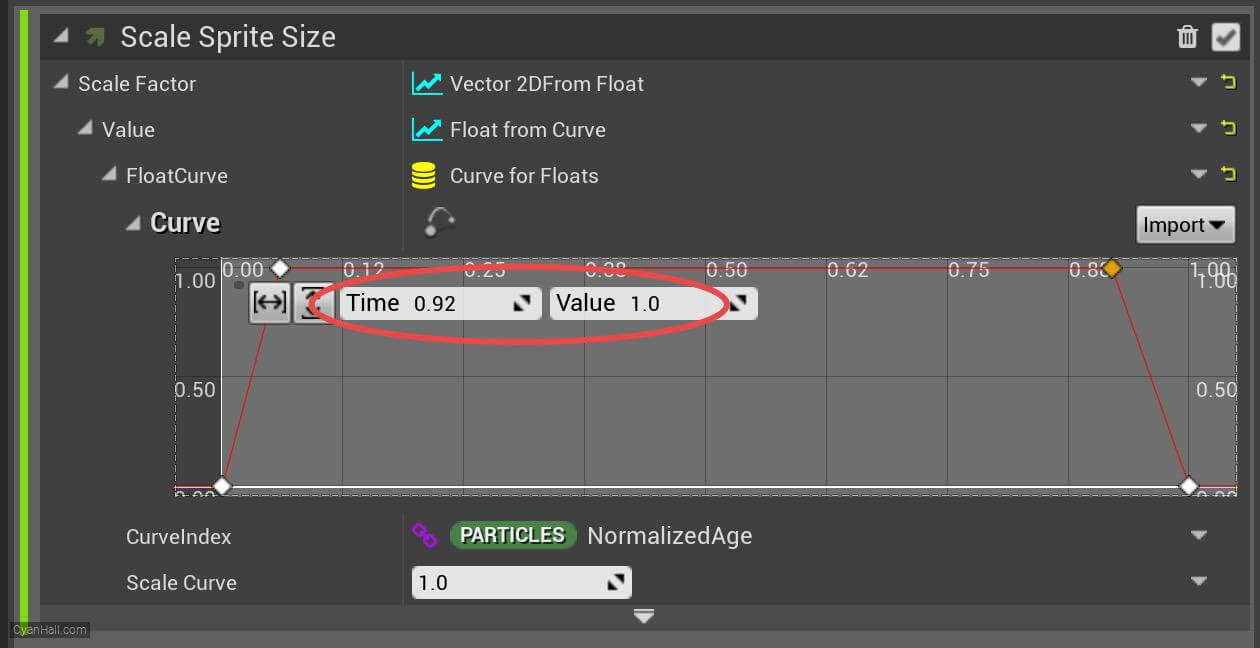
31.
Scale Mesh Size
Add
Scale Mesh Size module to the Particle Update section. 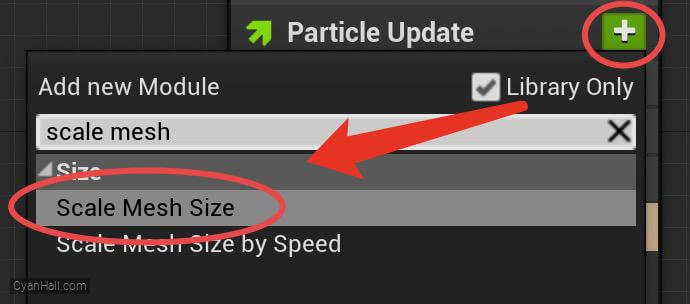
32.
Scale Mesh Size
Edit the
Scale Factor's value to Vector 2DFrom Float. 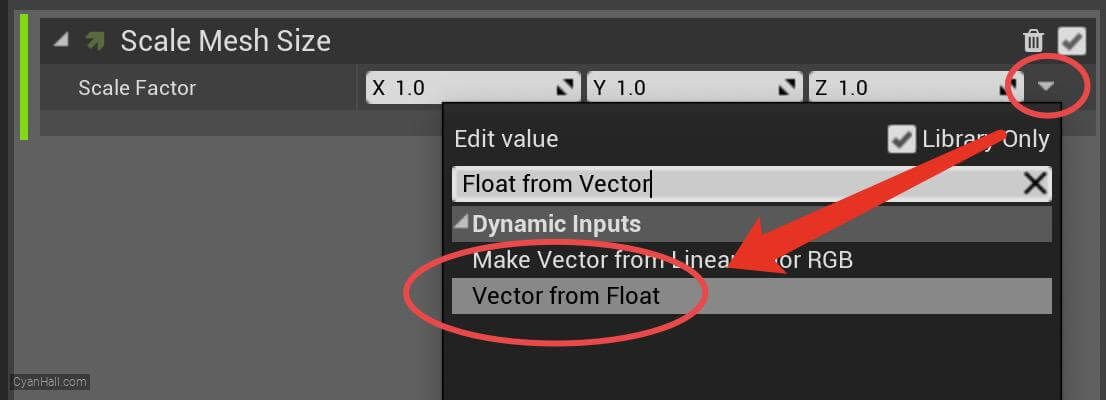
33.
Scale Mesh Size
Set the value type of
Value to Float from Curve 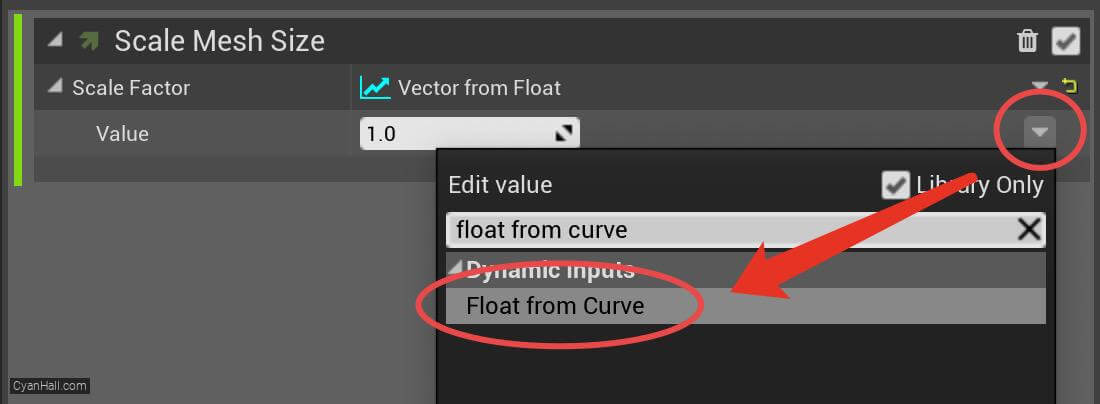
34.
Scale Mesh Size
Select the first point and edit its value to: (Time is
0.0, Value is 0.0). 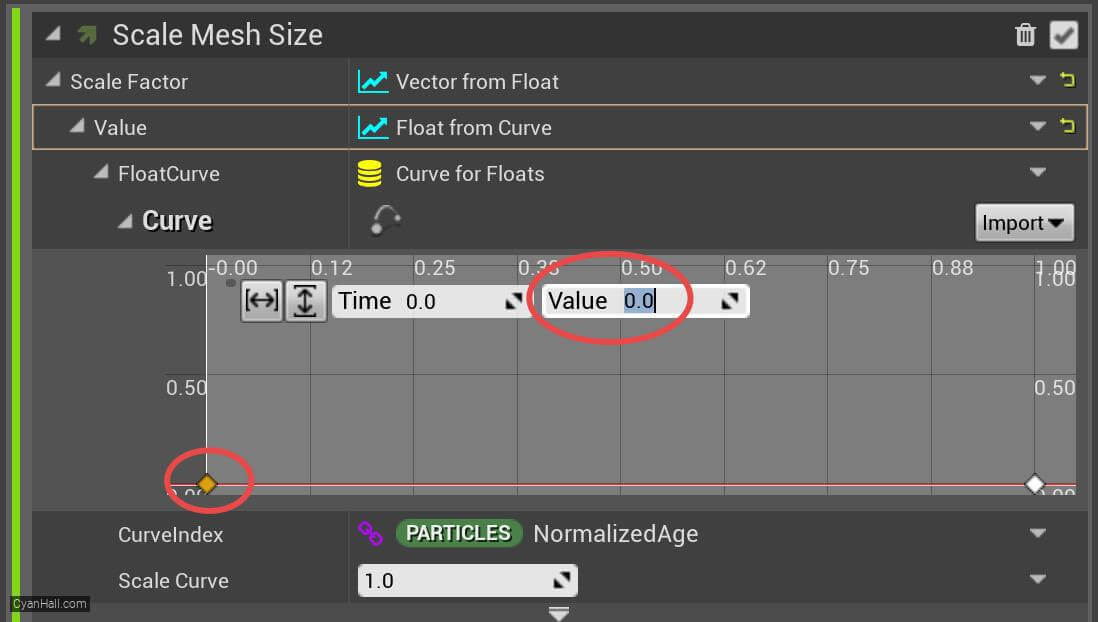
35.
Scale Mesh Size
Mouse over the small red circle, right click, and select
Add key to Curve. 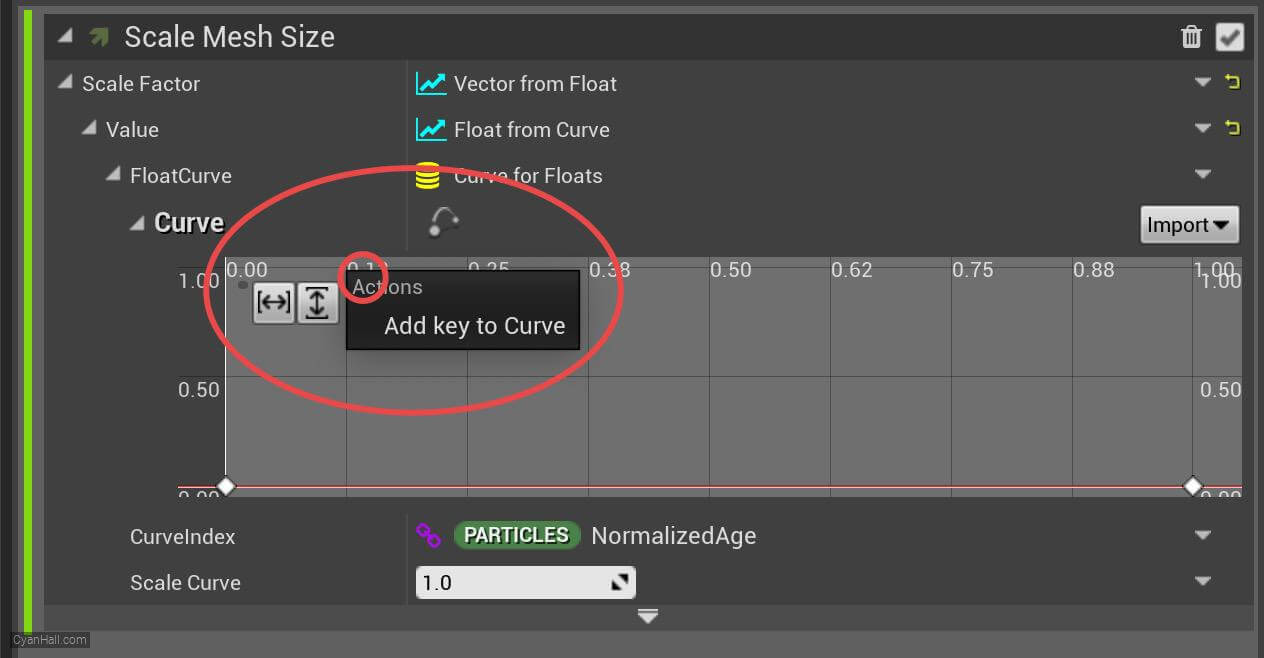
36.
Scale Mesh Size
Set the
Time of the newly added point to 0.12 and the Value to 1. 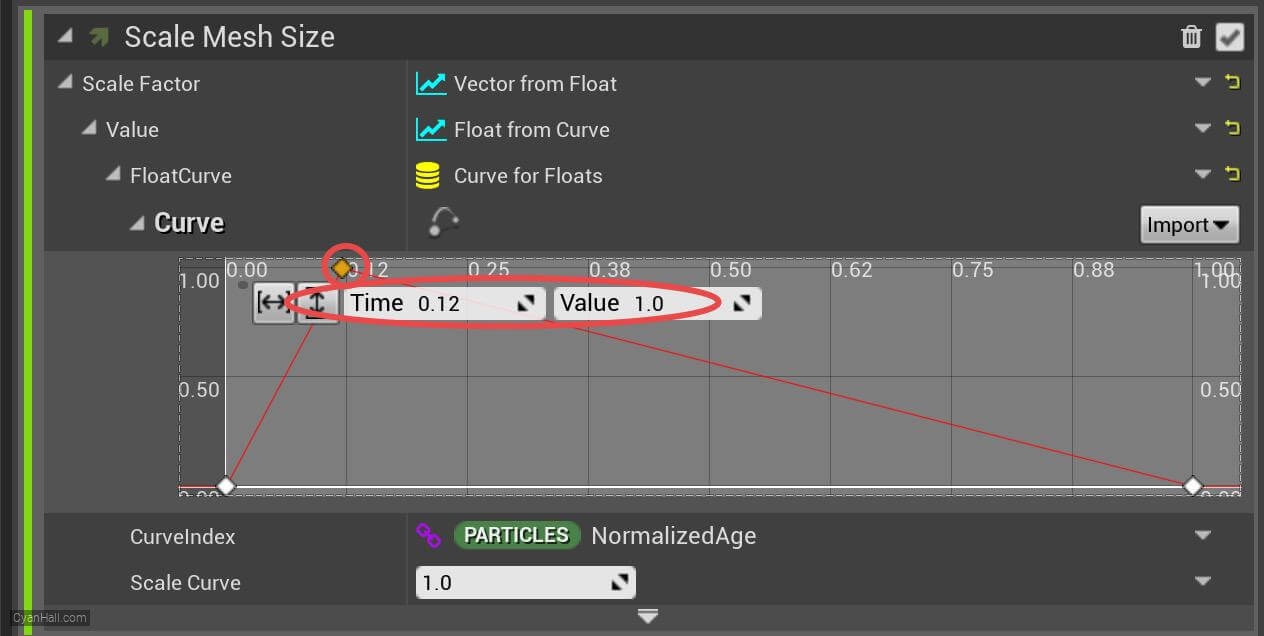
37.
Scale Mesh Size
In the same way, add a point:
Time is 0.88 and Value is 1. 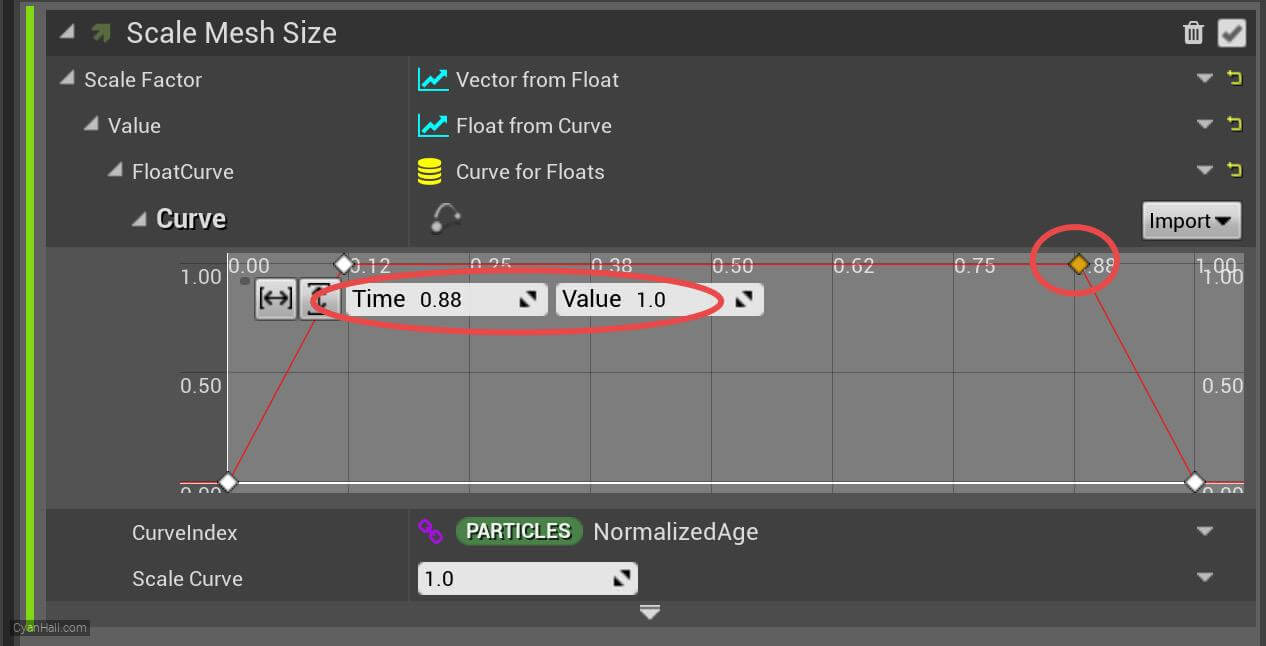
38.
Add Mesh Renderer
Add
Mesh Render module to the Render section. 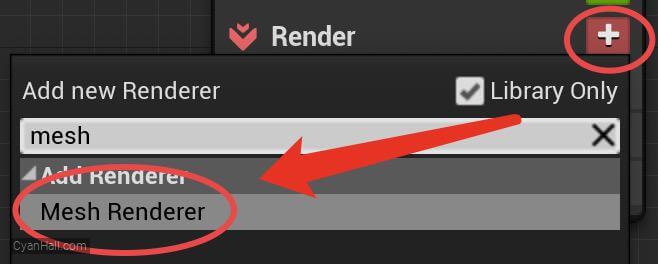
39.
Edit Mesh Renderer
Select the value of
Particle Mesh as S_Arrow. 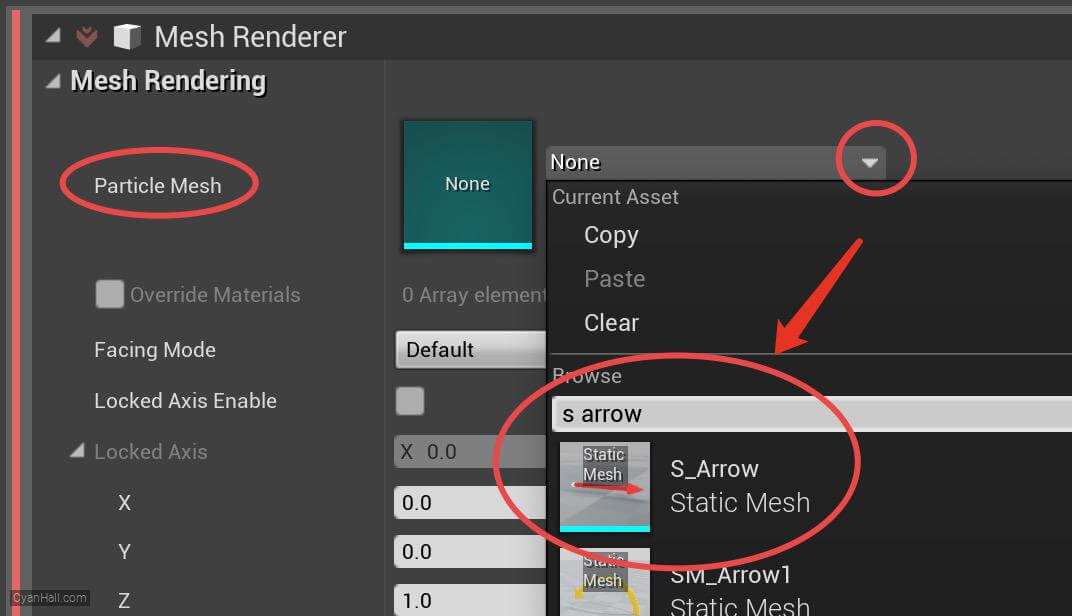
40.
Edit Mesh Renderer
Select the value of
Facing Mode as Velocity. 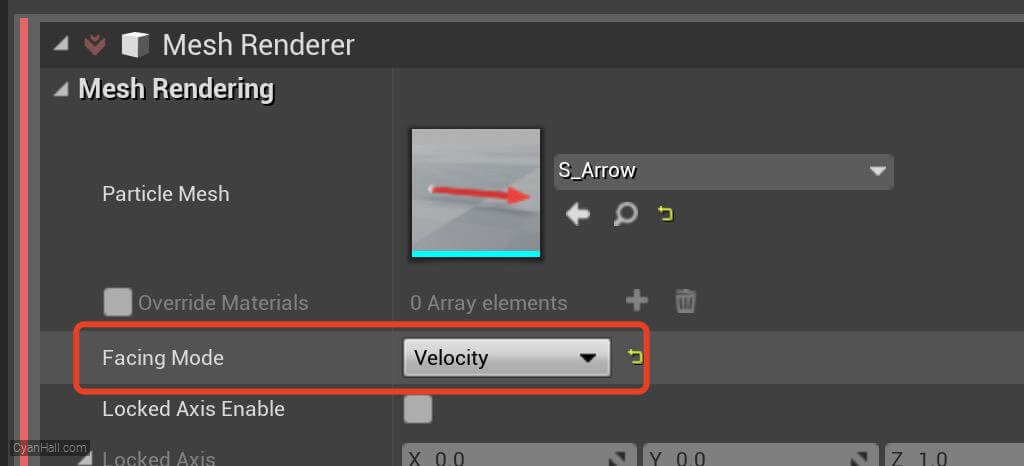
41.
Ribbon Renderer
Add
Ribbon Renderer module to the Render section. 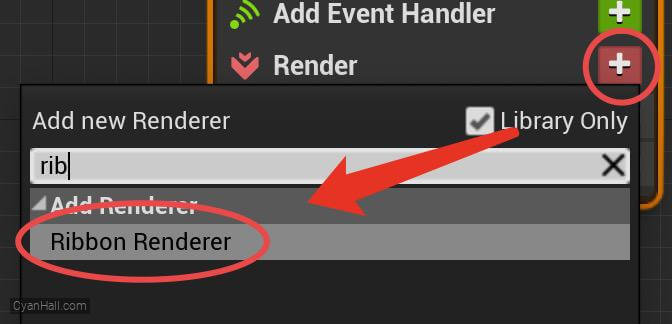
42.
Ribbon Renderer
Set the value of Material to
M_SimpleBeam 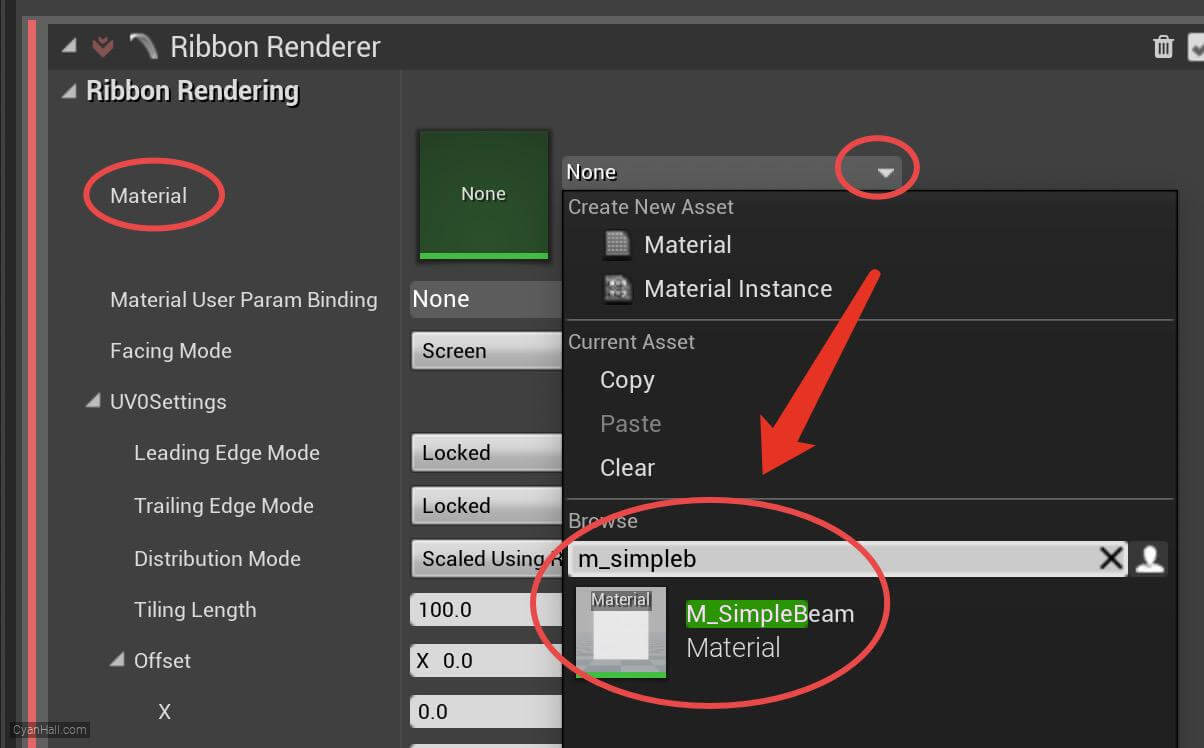
43.
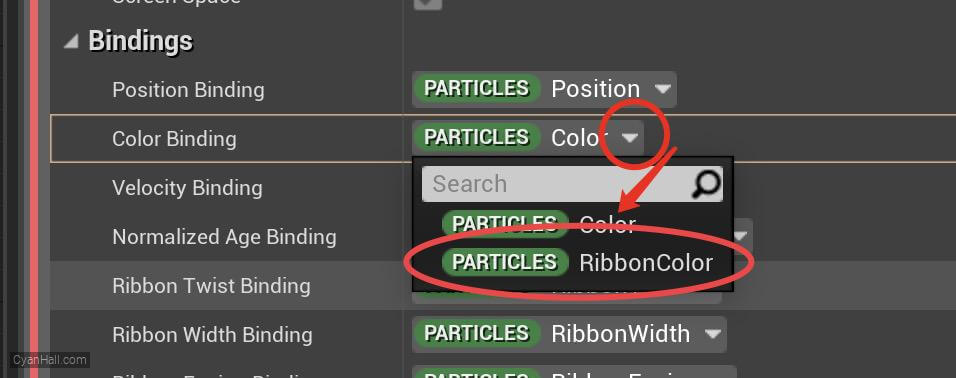
Ribbon Renderer
Set the value of Color Binding to
Each renderer shows its' bindings under the 'Bindings' category. Those bindings can even be overridden with custom attributes if desired, so multiple sprite renderers could each be driven by a different size attribute, for example.
RibbonColorEach renderer shows its' bindings under the 'Bindings' category. Those bindings can even be overridden with custom attributes if desired, so multiple sprite renderers could each be driven by a different size attribute, for example.
44.
🎉 Finish! 🎉
👉 Star me if it’s helpful.
Support Me: Patreon
Follow Me: Twitter, Reddit, Zhihu, Bilibili
Support Me: Patreon
Follow Me: Twitter, Reddit, Zhihu, Bilibili